Guide
Main - Requirements - Part1 - Part2 - Part3
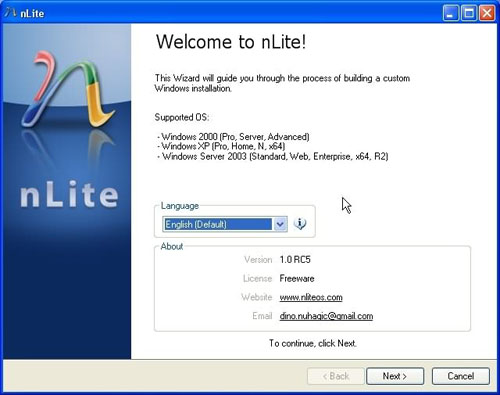
- Welcome screen shows you which version of nLite you are running and allows you to choose an alternate language.
- To continue click on 'Next'.
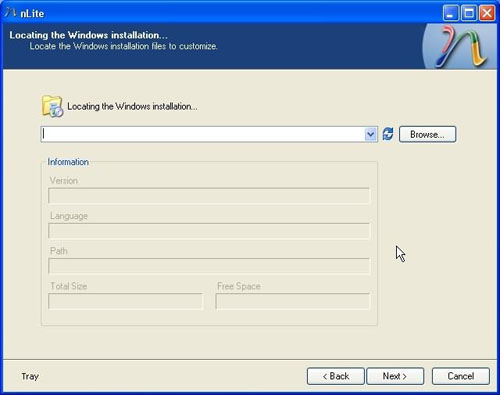
- We must now direct nLite to the folder which contains the windows installation files
- To do this Click on 'Browse'.
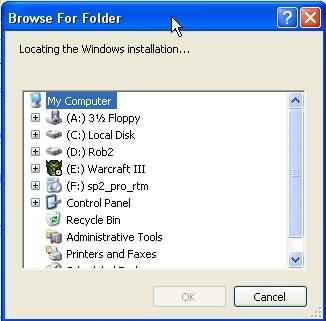
- Select the folder you created above
- nLite recognizes the language and version of your windows installation files
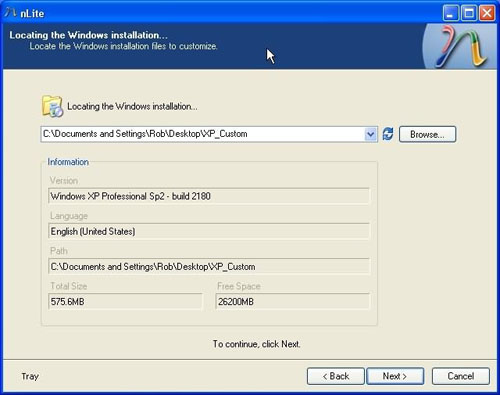
- You can save your current presets for future use or load presets from the last time you used nLite
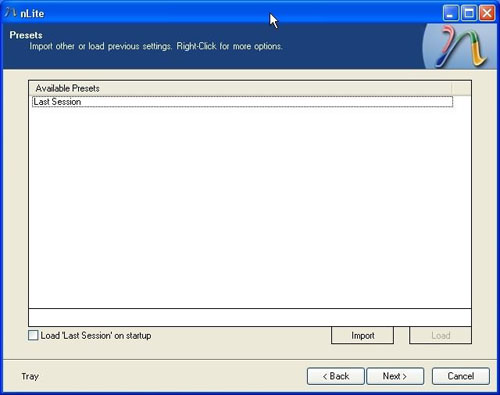
- At this screen we have the options to choose what we would like nLite to accomplish for us
- These are some of the most advanced and customizable features within nLite
- In this example all of the pages are selected, but you can pick and choose which ones to proceed with

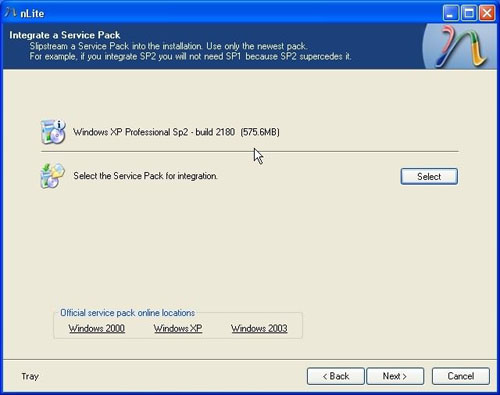
- To Integrate a Service Pack first download the correct pack for your operating system and save it to your hard drive
- Again, you can save it anywhere you want to on your hard drive. I personally chose to save it to my desktop so that I can delete it afterwards
- As you can see, nLite makes things easy for us!
- Links to download the most recent service pack are embedded within nLite
- We must now direct nLite to the service pack file that was downloaded in the step above
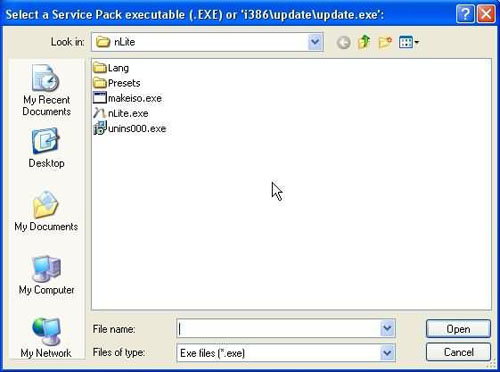
- Click on the 'Select' tab and the following box will appear
- Use the pull down arrow at the top of the window to help choose the correct file
- When you have located it, click on it, and and then select the 'Open' tab
- nLite will automatically extract and integrate the service pack into your windows distribution folder
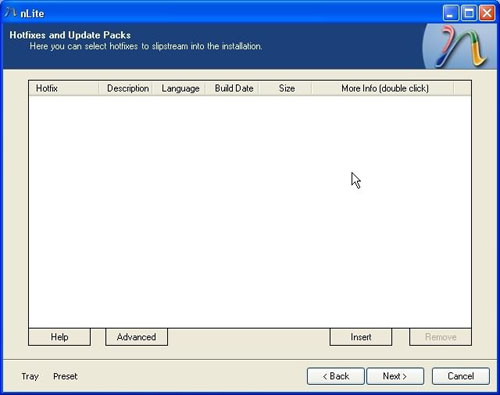
- In this window we have the option to add hotfixes and update patches into the installion
- I created a folder on my hard drive where I have downloaded all patches and updates for easy reference
- If you are using Internet Explorer, run Windows Update and look for the updates. Then download the actuall file by searching for it within Microsoft's website
Top - Create a folder somewhere on your hard drive to copy the windows source files into
- I called mine 'XP_Source' but you can use whatever name you prefer. Just make sure there is adequate space on your hard drive to hold the files
- Copy the full content from the distribution cd into this folder
- Start nLite
- Welcome screen shows you which version of nLite you are running and allows you to choose an alternate language.
- To continue click on 'Next'.
- We must now direct nLite to the folder which contains the windows installation files
- To do this Click on 'Browse'.
- Select the folder you created above
- nLite recognizes the language and version of your windows installation files
- You can save your current presets for future use or load presets from the last time you used nLite
- At this screen we have the options to choose what we would like nLite to accomplish for us
- These are some of the most advanced and customizable features within nLite
- In this example all of the pages are selected, but you can pick and choose which ones to proceed with
- To Integrate a Service Pack first download the correct pack for your operating system and save it to your hard drive
- Again, you can save it anywhere you want to on your hard drive. I personally chose to save it to my desktop so that I can delete it afterwards
- As you can see, nLite makes things easy for us!
- Links to download the most recent service pack are embedded within nLite
- We must now direct nLite to the service pack file that was downloaded in the step above
- Click on the 'Select' tab and the following box will appear
- Use the pull down arrow at the top of the window to help choose the correct file
- When you have located it, click on it, and and then select the 'Open' tab
- nLite will automatically extract and integrate the service pack into your windows distribution folder
- In this window we have the option to add hotfixes and update patches into the installion
- I created a folder on my hard drive where I have downloaded all patches and updates for easy reference
- If you are using Internet Explorer, run Windows Update and look for the updates. Then download the actuall file by searching for it within Microsoft's website